One Girl and her Thermie

Enter your email address to receive latest offers and recipes:*
How to purchase a Thermomix®?

Recipes

Gingerbread Body Scrub

With all the Christmas cookies, cakes, and other treats everywhere during the holiday season, it’s nice to give a homemade gift that’s not actually food. Though the ingredients in this recipe can be found in your kitchen, this Gingerbread Body Scrub is a perfect way to look after dry and tired skin. The added bonus, it smells and feels delicious!

There is something about the holiday season that I want to immerse myself in completely. It’s getting colder and darker, every day. The spirit of Christmas is around the corner and one of the things that keeps me in high spirits is enjoying the festive season to the fullest. This Gingerbread Body Scrub is not only great for the skin during these cold, dry winter months but with all these spices that emulate Christmas, which means that you can enjoy the scent all day long.

Ingredients:

  1. 220g  granulated sugar
  2. 170g brown sugar
  3. 1 teaspoon vanilla extract
  4. 1 teaspoon cinnamon, ground
  5. 1 teaspoon ginger, ground
  6. 1 teaspoon all spice, ground
  7. 1 teaspoon nutmeg, ground
  8. 60g coconut oil, melted
  9. 30g almond or apricot kernel oil
  10. storage jar

Recipe:

  1. Place granulated and brown sugar, vanilla and spices into TM bowl and mix 20 seconds, speed 3, Reverse blade
  2. Weigh and combine the oils in a small dish on the TM lid.
  3. Set TM  to 1 minute, speed 3, Reverse blade,  MC off and while blades are moving, slowly pour in oils until well combined.
  4. Scoop out the sugar scrub into a wide-rimmed sealable jar.

Disclaimer – Thermomix® is a cooking appliance intended to be only used for food preparation.

However, the recipes here are things I do with my own Thermomix.  I also have multiple Thermomixes and TM bowls, so I can safely use separate bowls for making these without any cross-contamination. I also clean the bowls thoroughly with soap, then vinegar, and finally run it through the dishwasher to ensure that it is thoroughly clean before making a food recipe in my bowl. If in any doubt, don’t make them.

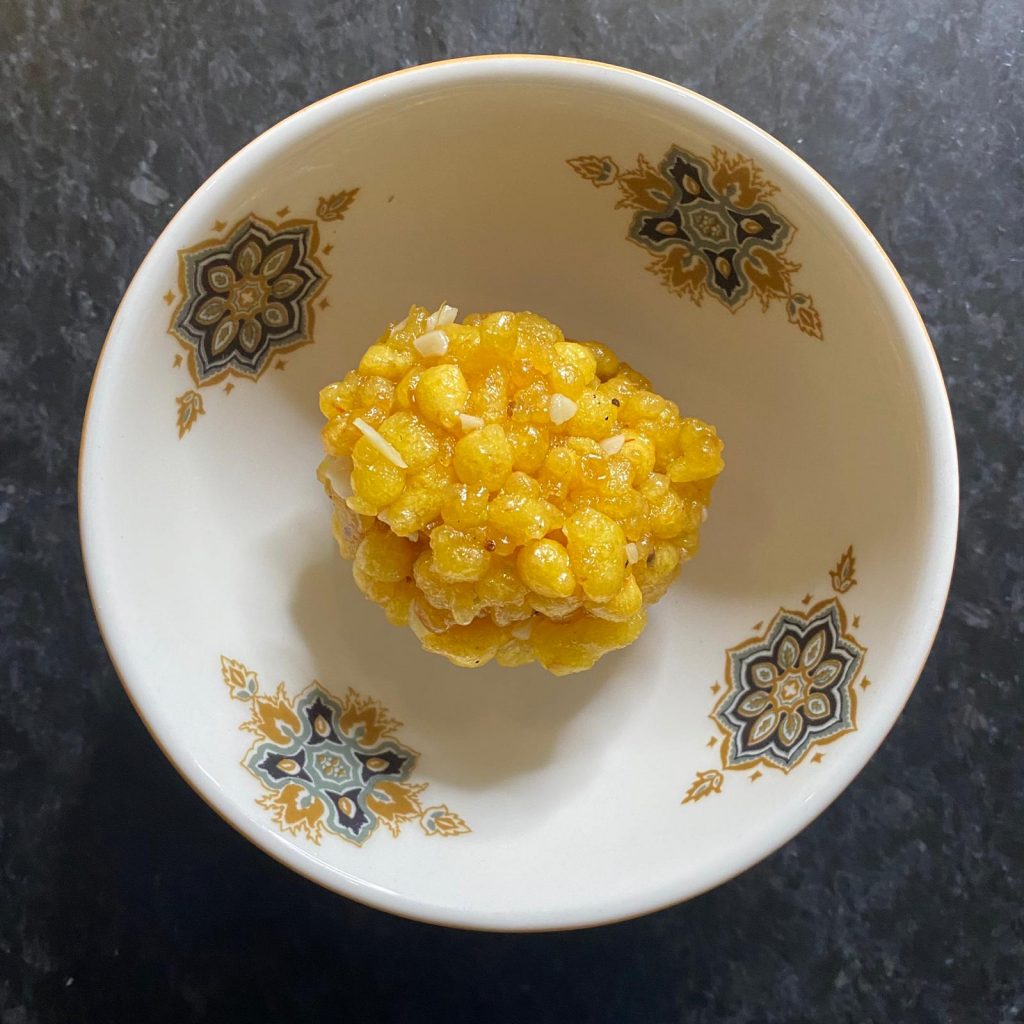
Motichoor Laddoo

Making Motichoor ke laddoos is easy but time-consuming. I’ll be honest until the second lockdown, I never made this before but the lockdown has made us all do things that we don’t usually do and at Diwali time, I would normally head to my favourite Indian Mithai shop and stand in line for the most amazing sweets. Even if the shop is open, I can’t see myself queuing for hours and social distancing. It’s just safer to stay home and convert recipes. I have a Thermomix, remember and in my Thermomix, I can make almost anything.

This recipe is for Motichoor Laddoo (also laddu) is a poplar and attractive, round-shaped laddoo recipe made with saffron-colored, boondi pearls. It is a well known sweet recipe and mainly prepared for festivals and occasions to share with family and friends. It is usually made with a boondi jhara but this recipe uses commonly available kitchen spoons.

The major difference between Boondi laddoo and motichoor laddoo is the size of the tiny boondi/fried gram flour balls. Boondi laddoo has the gram flour balls bigger in size and motichoor laddoos have smaller ones. Both the ladoos are made from gram flour or besan batter. The batter is poured through a ladle or sieve with perforations and these give rise to round shaped droplets, called as boondi (derived from the word ‘boond’ in hindi which means water droplets).

There are two types of boondi laddoos; one is a soft textured one and the other is a crisp hard one. Both these laddoos have some variations in the method, thus yielding different textures.

In Hindi the word ‘moti’ means pearl and ‘choor’ means to crush or crumble. Literally translated to crumbled pearls. Actually, when you hold these laddoos in your hand and even apply a little pressure, they crumble.

Laddoos are offered to many Indian gods & goddesses. Many Indian temples offer ladoos as prasad to the devotess. One of the most famous laddoos, we have had as prashad, are from the tirupati temple in Andhra Pradesh, India. Another prashad, we look forward is the boondi ladoo from shirdi sai temple, nasik, India. Whenever we want to make any food for deities then refrain from tasting or smelling the food. Prepare the food with lot of devotion, cleanliness and peaceful state of mind.

If you have a pooja or any religious activity at home, then these motichoor laddoos, can be given as prashad to the devotees.

So if you, like me, are celebrating Diwali this weekend, then I hope you enjoy this recipe.

We all fight together this pandemic, pray for all those families who have lost the loved ones, broken relationships, lost jobs and hope the best to come for everyone just as Diwali teaches us that light triumphs over darkness, good over evil, knowledge over ignorance.

Barfi

Milk Powder Burfi

Burfi (Burfee, Barfi) is a fudge-like milk sweet and often served at Diwali (Deepvali) celebrations. Like fudge, the process of making burfi may seem simple however can be tricky. This Thermomix version takes all the guesswork out.

Traditionally this requires khoya or mawa – milk powder – and some does need sugar syrup. But I always like to take shortcuts and have prepared using milk powder and this does not require you to make any sugar syrup or check for consistency. This method using milk powder makes it quicker and easier with no compromise in taste if you follow the steps exactly as given below.

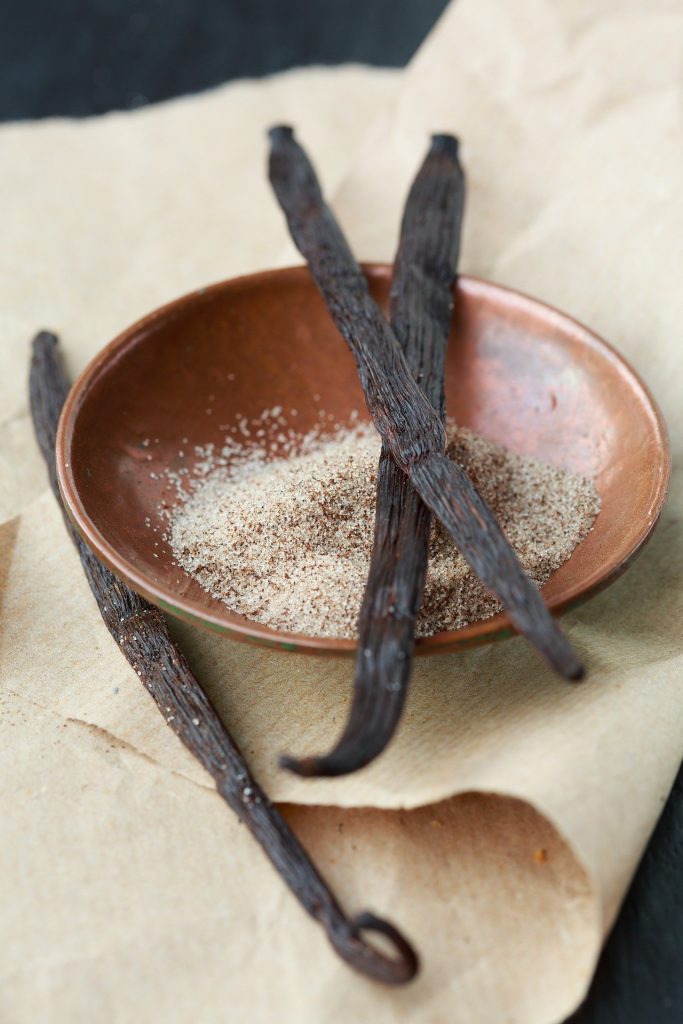
Vanilla bean and sugar

Vanilla Bean Paste

Vanilla is one of the most expensive spices available – saffron takes the prize for the most pricey. Its high cost is due to the intense labour needed to produce each bean. The pods hold the seed of the vanilla orchid and each flower must be pollinated individually. Once harvested, the pods are dried and sweated before being used in perfume making and aromatherapy as well as the culinary world. Vanilla bean paste has a more concentrated vanilla flavour.  Making your own homemade vanilla bean paste is a simple, easy and effortless process that can save you money and give you the best quality of bean paste for all your baking needs. Add it to your baked good when you want to enhance the flavour of vanilla.

I’m so lucky to have access to fresh vanilla from India which I bring back with each time. But you can buy vanilla pods in bulk from various different retail and online stores too.

Vanilla is a baker’s best friend. Its beautiful rounded flavour brings out sweetness and caramel notes in its accompanying ingredients making it an excellent addition to cakes, custard, ice cream and patisserie. Its use in European cooking is synonymous with sweet dishes but in much of the world it is considered a savoury spice. For something a little different, try pairing with the wonderful sweet savouriness of lobster.

Credit: This recipe has been re-blogged from Australian sisters, Tracey and Joanne, a.k.a. Sistermixin now under their ‘Additive Free Lifestyle’ website. It’s been one of their most popular recipes and I’ve personally been making it for years. I’ve just made them again in time for gifting as Christmas presents.

yulia-khlebnikova-yIE7pZUmT_s-unsplash

Watermelon Lemonade

Have you had your fill of fresh, summer watermelon yet? I hope not because you’ve gotta try this homemade watermelon lemonade! It’s so….. “summery”!! That mint just takes the watermelon flavor to a new level, making this watermelon lemonade so refreshing! With only 5 ingredients it doesn’t get any easier!

Chocolate Mousse Ice-cream

Thermomix Cost Saving: Chocolate Ice-cream

How do you save money with your Thermomix? There are so many ways that owning a Thermomix can help you save you a little or a lot off your weekly grocery bill that I thought I’d share some of my Top Tips!  In this series of blog posts, I will share Thermomix Cost Saving tips, let’s talk about ice-cream, chocolate ice-cream in the Thermomix to be exact…

Summer is here and for anyone who has visited an ice-cream van in the past few weeks, will realise that you don’t get much change from £20 for a family of 4. We went to Ikea last week and my daughter wanted an ice-cream from the van in the car park. She requested a lime screwball and I was hit with a bill of £4.50! I wouldn’t mind if it was worth it but when she was eating it, she said she could taste the sugar – highly sugared ice-cream and the lime syrup was sickly. What a waste of money.

We have been doing cost savings with my team and I was glad to see that Ellie Mantle had actually made and costed out the savings making homemade ice-cream.

How do you make chocolate ice cream in the Thermomix?

Ingredients
Whipped Cream
  • 300 g double cream
  • 50 g icing sugar
Chocolate Custard
  • 350 g dark chocolate, small pieces or callets
  • 300 g double cream
  • 100 g caster sugar
  • 6 egg yolks, from medium eggs
Egg Whites and Serving
  • 6 egg whites, from medium eggs
  • 1 pinch cream of tartar
  • 2 Tbsp caster sugar

Instructions

Whipped Cream
  1. Place the freezer-proof container for storing the ice cream in freezer.
  2. Insert butterfly whisk. Place cream and icing sugar in mixing bowl then, without measuring cup, whip without setting a time/speed 3 until softly whipped, watching carefully to avoid over-whipping. Remove butterfly whisk, transfer to a bowl and refrigerate. Clean mixing bowl.
Chocolate Custard
  1. Place chocolate in mixing bowl and grate 5 sec/speed 8. Transfer to a bowl.
  2. Place 50 g grated chocolate in a bowl and set aside for garnish.
  3. Place 300 g grated chocolate, cream, sugar and egg yolks in mixing bowl then cook 8 min/80°C/speed 4. Transfer to a wide, shallow bowl to cool. Clean mixing bowl and butterfly whisk thoroughly (see tips).
Egg Whites and Serving
  1. Insert butterfly whisk. Place egg whites, cream of tartar and caster sugar in mixing bowl then, without measuring cup, whip 3-4 min/speed 3.5 until stiff peaks form.
  2. When chocolate custard mixture is cool, gradually fold in whipped cream with spatula.
  3. Remove butterfly whisk, then carefully fold egg whites into chocolate custard-cream mixture with spatula. There should be no swirls of egg whites or whipped cream in the mixture.
  4. Spoon mixture into the container from freezer. Cover tightly with cling film on the surface and freeze for 2 hours or longer. Check consistency before serving. If very hard, place in fridge until desired consistency is achieved.
  5. Serve ice cream sprinkled with reserved grated chocolate.

Useful Items

cling film, freezer-proof container, freezer, refrigerator


Hints & Tips
  • Use good quality dark chocolate with high cocoa content (70% cocoa) for best results.
  • Cream whips better when chilled and may not take long to form peaks depending on temperature and fat content. Watch carefully to avoid over-whipping.
  • Egg whites whisk better at room temperature.
  • For best results use egg whites that are approx. 7-14 days old.
  • The egg whites, mixing bowl and butterfly whisk must be free of any trace of egg yolk or grease when whisking or they will not rise properly.
  • To make your own icing sugar for the whipped cream, grind 100-200 g granulated sugar 15 sec/speed 10. Retain excess for future use.
  • Other garnishes can include candied orange zest, finely chopped hazelnuts or roasted almonds.
This is a Cookidoo recipe – Chocolate Mousse Ice-cream
Ellie shopped in Lidl so ingredients used to cost the following:
  • 350g Dark Chocolate, £1.50
  • 6  medium free-range eggs £0.70
  • 600ml of double cream £1.70
  • Sugar (caster and icing) £0.008
  • Pinch of cream of tarter 0.1p.
  • >>Cost per scoop = 43.5p!

That’s a 10-fold cost saving. And if it just wasn’t for the money, my daughter said it tasted better too. Of course, it did.

Thermomix Cost Saving: Pizza

How do you save money with your Thermomix? There are so many ways that owning a Thermomix can help you save you a little or a lot off your weekly grocery bill that I thought I’d share some of my Top Tips!  In this series of blog posts, I will share Thermomix Cost Saving tips, pizza…making homemade in the Thermomix to be exact…

As a family, Fridays are always pizza night.  We’ve taken it a step further in our family and made it our weekly “pizza and movie night”, complete with fresh, amazing homemade pizza. In this blog, I’m going to compare the costs between buying a pizza and making your own.

If you ordered take away or went to a restaurant, you could be paying on average £12 just for a Margherita  Pizza (other pizzas will cost more). That translates into at least £24 for two people and £48 for a family of 4. The same family of 4 would probably spend at least £24 on the supermarket’s not so freshly made pizzas.

Dominos Cheese and Tomato 13.5″ pizza (Docklands Branch) £16.99

Franco Manco (Canary Wharf) £7.95

Papa Johns (Docklands Branch), large pizza £16.99

Pizza Express Margherita £8.45

Pizza dough only has a few ingredients, most of which are probably already in your store cupboard.  As for toppings, let’s start with a simple mozzarella and basil pizza with tomato sauce, otherwise known as Pizza Margherita. Here’s a list of the ingredients and their cost for two medium pizzas.

Ingredients & costs

  1. Flour, bread flour, 500g, 65p
  2. Active dry yeast, 1 packet (8g), 20p
  3. Olive oil, extra virgin, 2 tbsp, 10p
  4. Salt, 1 tsp, less than 1p
  5. Sugar, 1 tsp, 5p
  6. Whole peeled tomatoes, 1 can (400g), £1
  7. Mozzarella cheese, 125g, £1.25
  8. Basil, free from the garden
That’s a rough total of just £3 each versus a potential £12-£24 or £48 spending. Oh, and let’s not forget that the kneading will be done for you in just 2 minutes by the Thermomix. This is just a simple example of how the Thermomix pays for itself.
Now, this is what I call a no-brainer…

Coffee Face Scrub

Scrubbing the face with coffee grounds can help to clear away dead skin cells and unclog the pores. The chlorogenic acids in coffee may also reduce inflammation and protect against some strains of bacteria. This coffee face scrub is a brilliant recipe.

With all this free time spent at home in quarantine, I’ve been looking for completely natural ways to recreate some of my favourite products. I love using face exfoliators and there are some great 100 percent natural and sustainable ones out there on the market. However, for love or money, I can’t get down to my local Boots or Lush (who doesn’t love Lush), so it’s time to get creative in the kitchen. Again.

If you’re a coffee lover, the idea of using precious coffee beans in a body scrub might shock you, but give this DIY product a shot—you’ll be glad you did!

How to make a DIY Coffee Scrub

Thanks to Taste of Home blog for providing the background and recipe for this one.

Coffee Benefits for Skin

The sand-like texture of coffee grounds makes a great exfoliant in homemade scrubs. The grounds work to gently remove dead skin cells, which helps to rejuvenate and boost circulation. (Hello, youthful, glowing, silky-smooth skin!) Exfoliants can also plump and tighten, helping to temporarily reduce the appearance of cellulite.

I’m including the Thermomix and non-Thermomix method so everyone can benefit.

Ingredients:

  • 80g medium coarsely ground coffee (fresh, if possible)
  • 40g coconut oil
  • 40g  vitamin E oil
    3 to 5 drops CBD oil (optional)

Recipe:

  1. Weigh coffee into TM bowl and then grind for 30 seconds, speed 6.
  2. Add coconut oil and heat 2 minutes, 50 degrees, speed 3 to combine.
  3. If adding CBD oil, add and then mix 10 seconds, speed 3.
  4. Decant into and bowl and use.
  5. Gently apply and massage into the skin in circular, upward motions for three minutes.
  6. Rinse with water and pat dry.

Disclaimer – Thermomix® is a cooking appliance intended to be only used for food preparation.

However, the recipes here are things I do with my own Thermomix.  I also have multiple Thermomixes and TM bowls, so I can safely use separate bowls for making these without any cross-contamination. I also clean the bowls thoroughly with soap, then vinegar, and finally run it through the dishwasher to ensure that it is thoroughly clean before making a food recipe in my bowl. If in any doubt, don’t make them.

Top 10 Bakes during Lockdown

Baking has become the nation’s biggest boredom breaker to fill the days of lockdown which has resulted in shortages of flour and yeast all over the country.

Baking is a great way to unwind, pass the time and bring some fun into the household.

So here’s are the top 10 favourites as compiled by BakeryandSnacks.com with my favourite recipe suggestions to use with a Thermomix.

  1. Apple Pie – A truly delicious apple pie is about two things: perfect pastry and a generous filling of sweet, fluffy apples. This recipe delivers on both counts.
  2. Cheesecake – This is a classic New York Baked Cheesecake that turns out perfect every time. It’s actually the most popular recipe on The 4 Blades blog, so when they were developing the ‘Champion Cheesecakes’ section, it was an absolute must-include. This is my all-time favourite recipe and when my Dad tried it, he said I should open a dessert shop, it’s that good.
  3. Rhubard Crumble For a classic spring pudding recipe, make this pretty rhubarb crumble recipe and serve with plenty of custard.
  4. Victoria Sponge The perfect party cake, a Victoria sponge is a traditional bake everyone will love. This recipe from Cookidoo is a good one and from the British Isles on a Plate cookbook. 
  5. Cupcakes. I can’t take credit for this recipe, as it’s been converted by my friend Kerry New, who I believe converted it to the Thermomix from Country Women’s Association in Australia (CWAA) a recipe that her grandmother made. Hats off to the original creator of this recipe, it is still single-handedly my favourite vanilla cake recipe and my go-to for birthday cakes and cupcakes. There’s also variations to the recipe which turn this basic recipe into chocolate, coffee, orange or lemon cake. No wonder it is my go-to.
  6. Bread Cooking can be good for the soul and making bread is such a rewarding, therapeutic, tactile thing – you’ll be so proud of yourself when you’ve cracked it. If you have never made bread before, I suggest you try this ‘Quick Bread’ recipe on Cookidoo which uses a Dutch Oven (I use my Le Creuset Cast Iron Casserole) to bake the bread. Do try it.
  7. Chocolate chip cookies  A chocolate chip cookie is a drop cookie that originated in the United States and features chocolate chips or chocolate morsels as its distinguishing ingredient. Circa 1938, Ruth Graves Wakefield added chopped up bits from a Nestlé semi-sweet chocolate bar into a cookie.
  8. Lemon Drizzle Cake Everyone needs an easy lemon drizzle cake that is super-quick to bake and perfect to wheel out for office cake days or visiting mothers-in-law.
  9. Savoury Pie  The secret it a good pie is the ingredients. This chicken and leek pie is a Cookidoo recipe from the British Isles on a Plate cookbook. I absolutely adore this recipe, as from start to finish the recipe is made in the Thermomix and it’s a great recipe.
  10. Rainbow Coloured Sponge Cake I’d like to take inspiration from Great British Bake-Off winner Candice Brown reveals how to make this show-stopping rainbow cake. Candice Brown’s rainbow cake recipe would be the perfect centrepiece for any charity bake sale, or party. The Great British Bake Off winner has created this showstopping rainbow cake to support children’s charity the Rainbow Trust – who offer support to seriously ill children and their families. And yes, I know this link isn’t to a Thermomix recipe. But if you’ve got this far, you surely would ve able to convert a recipe by now. If not, this is a fabulous time to try.