One Girl and her Thermie

Enter your email address to receive latest offers and recipes:*
How to purchase a Thermomix®?

Basics

Save Money with Thermomix: Raspberry Jam

Save money with Thermomix. It’s what we as owners and users say all the time. But finally, I’m able to share some of the cost savings with specific recipes like this raspberry jam recipe which is one of our household staples but also one that is a wow, demonstration recipe.

Why is it a wow recipe? Raspberry jam is so quick and delicious! I prefer to reduce the sugar: 350 g frozen raspberries + 250 g jam sugar. If you want it less set, only cook for 20 minutes. Great topping for your plain yogurt.

But we’re here to talk about cost savings, so I’ve done a quick search for some tomato soups in an online supermarket. I’ve chosen Ocado today, but I will be comparing all of them in this series of articles to be fair.

Ingredients

  • 250 g frozen raspberries
  • 250 g jam sugar, £2.35
  • 20 g lemon juice

Preparation

  1. Place raspberries, jam sugar, and lemon juice in mixing bowl then, with the simmering basket in place of measuring cup, cook 25 min/105°C/speed 1. Meanwhile, prepare jam jars (see tip).
  2. Test setting point of jam (see tip). Transfer to warm glass jars with screw-top lids (see tip), leaving approx. 5 mm gap at the top. Make sure that rims of jars are clean and close immediately. Label before storing in a cool, dry place. Once opened, store in fridge.

Hints & Tips

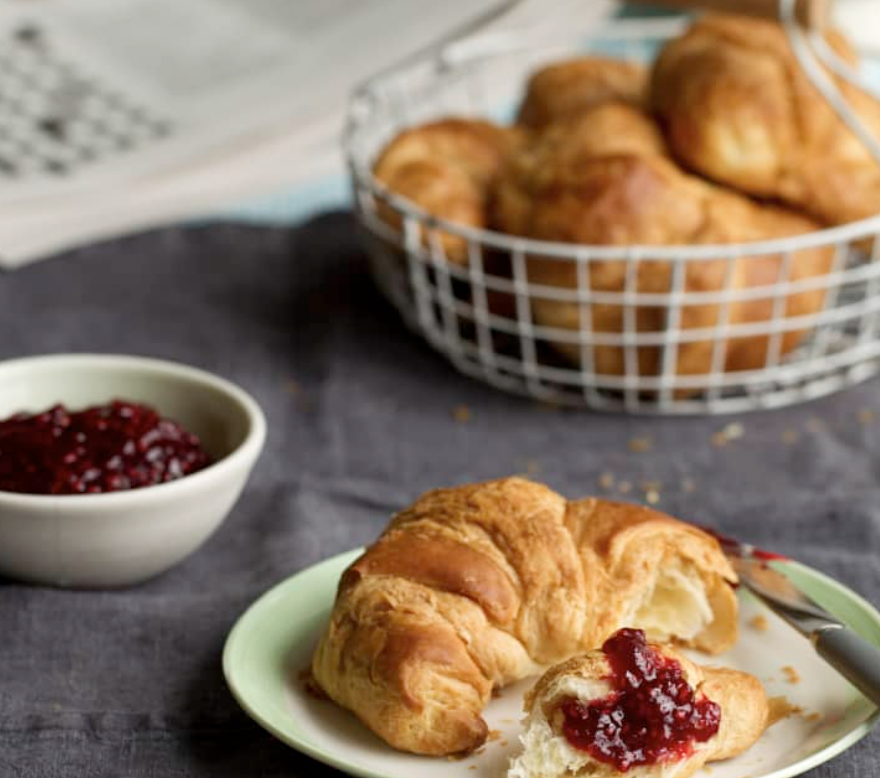
  • Preserves are really easy to make in the Thermomix®, and save you standing over a stove stirring for hours. Use this recipe in the butterfly cakes recipe. Also delicious served with croissants.
  • To prepare jars, place 500 g water in mixing bowl. Place jars and lids upside down in the centre of the Varoma and steam 20 min/Varoma/speed 1. Leave to drain – do not dry or touch the inside surfaces. Alternatively, thoroughly wash jars and lids in hot, soapy water. Rinse by pouring over boiling water. Prepare for filling, if needed, by placing on a clean tea towel in a roasting tin and heating in the oven at 100˚C until required. Always pour hot jam into still warm jars.
  • Setting point test: place a saucer in the freezer for 5-10 minutes. Place 1 tsp jam onto cold saucer. When cool, push jam with your finger. If it wrinkles, it is ready. If not, boil jam for a further 2 min/105°C/speed 3, then test again.
  • To make twice as much jam, double the ingredients and cook for the same time, 25 min/105°C/speed 1.

Nutrition per 1 total recipe

  • Calories 4443 kJ / 1062 kcal
  • Protein 3.1 g
  • Carbohydrates 260.8 g
  • Fat 0.8 g

Get this recipe on Cookidoo https://cookidoo.co.uk/recipes/recipe/en-GB/r68363

Save money with Thermomix: Butter

Save money with Thermomix. It’s what we as owners and users say all the time. But finally, I’m able to share some of the cost savings with specific recipes like this butter recipe which is one of our household staples but also one that is a wow, demonstration recipe.

Why is it a wow recipe? Well, this recipe is so easy to make but showcases some of the greatest Thermomix functions – the whipping function. Home-made butter is incredibly easy to make but sounds rather impressive. Butter begins by over-whipping cream which can be done with a Thermomix.

But we’re here to talk about cost savings, so I’ve done a quick search for some tomato soups in an online supermarket. I’ve chosen Sainsbury’s today, but I will be comparing all of them in this series of articles to be fair.

Butter prices:

Compared to double cream:

In fairness, the £0.50 as of today’s date (December 28th 2022) doesn’t seem that much producing 250g butter from 600ml of double cream, but the trick is when do you buy your double cream >> read buy it at a discount and what do you do with your butter > read, turn it into flavoured butters.

The addition of 5-10% of flavouring elevates the falvour of basic butter but when buying store bought, increased the prices by 60-100% too.

Who doesn’t like a flavoured butter?

Ingredients

  • 600 g pure cream
  • 500 g chilled water

Preparation

  1. Insert butterfly whisk. Place cream into mixing bowl and beat 1-3 min/speed 4, or until solids and liquids have separated. Remove butterfly whisk.
  2. Using the simmering basket, strain liquids from solids, reserving buttermilk for later use, if desired.
  3. Place water and butter solids into a mixing bowl and mix 5-10 sec/speed 4. Liquids and solids should separate again (see Tips).
  4. Using the simmering basket strain liquids from solids a second time, so that only butter remains. Roll the butter into a sausage shape to make butter rounds, form into a rectangular shape or spoon into an airtight container (see Tips). Use as needed.

Hints & Tips

  • Cream closer to its expiry date will separate faster.
  • For butter that stays fresher for longer, wash a second time using 500 g chilled water in step 3 to ensure butter is completely clean.
  • This recipe will produce approx. 250 g buttermilk. Reserve the buttermilk (liquid portion) after draining in step 2 to use in scones, breads, pancakes, soups or hot drinks. See Cookidoo® for recipes. Buttermilk can also be frozen for later use.
  • Butter will keep sealed in the freezer for up to 3 months.
  • Butter will keep sealed in the fridge for up to 2 weeks.
  • Herb butter: place 1 garlic clove; 5 sprigs fresh dill, leaves only; 5 sprigs fresh flat-leaf parsley, leaves only; and 6 fresh basil leaves into mixing bowl and chop 3 sec/speed 7. Scrape down sides of mixing bowl with spatula then proceed as per recipe.
  • Salted butter: add ½ tsp sea salt after washing in step 3 and mix for a few seconds to incorporate. Salt assists in giving the butter a longer shelf life.
  • Spreadable butter: add 50 g oil, adjusted to taste and whip 15 sec/speed 4 through finished butter before storing in the fridge.
  • Lighter butter: add 50 g reserved buttermilk and whip 15 sec/speed 4 back into the finished butter before storing in the fridge.
  • Flavoured butter: add other flavours (e.g. oils, sugars, spices) to the butter and mix 20-30 sec/speed 4 before storing in the fridge.

Nutrition per 25 g

  • Calories 829.8 kJ / 197.5 kcal
  • Protein 1.4 g
  • Carbohydrates 1.1 g
  • Fat 21.3 g
  • Saturated Fat14 g
  • Fibre 0 g
  • Sodium1 2.9 mg

Get this recipe on Cookidoo https://cookidoo.co.uk/recipes/recipe/en-GB/r68363

Save money with Thermomix: Icing sugar

Save money with Thermomix. It’s what we as owners and users say all the time. But finally, I’m able to share some of the cost savings with specific recipes like this icing sugar but also one that is a wow, demonstration recipe.

Why is it a wow recipe?  Well simply put it shows off the milling function beautifully.  Speeds 7 – 10 and Turbo: Grinding or miling ingredients such as sugar, wheat and coffee beans, blending to a completely smooth texture for creamy soups, smoothies, and ice-cream and chopping tough ingredients such as cured ham and hard cheeses.

Powdered sugar, also called confectioners’ sugar, or icing sugar, is a finely ground sugar produced by milling granulated sugar into a powdered state. Powdered Sugar is made by grinding granulated sugar with cornstarch to the desired grain size. White in color, powdered sugar has a sucrose content of approximately 97.0% and a cornstarch content of approximately 3.0% to prevent caking and increase shelf life. However, making your own in your Thermomix can your money on buying ready-milled icing sugar and you can do it instantly, hence not needing any corn starch too, so 100% pure.

But we’re here to talk about cost savings, so I’ve done a quick search for some tomato soups in an online supermarket. I’ve chosen Tesco today, but I will be comparing all of them in this series of articles to be fair.

Compare this with the cost of their granulated sugar, which you can mill into icing sugar

The cost savings would be £1.15 on the Silver Spoon and only 70p on the Billingtons. 

That kind of makes sense, as Golden Caster Sugar is more expensive so you would see a saving but not as much. But image how much you could save on a weekly, monthly, or even yearly basis. These pennies can add up to pounds very quickly especially if you bake a lot which I do.

*What Is Golden Caster Sugar? Most commonly found in the UK, golden caster sugar is made from unrefined sugar cane and sometimes beets. It has a subtle buttery flavor and gives baked goods a lovely shade of brown.

Ingredients

  • 200 g sugar

Preparation

  1. Place sugar in mixing bowl and grind 20 sec/speed 10. Use icing sugar as needed.

Hints & Tips

  • Icing sugar can be stored for long periods of time in an airtight container.
  • For best results, grind sugar in 100-200 g batches.
  • If more icing sugar is needed, repeat the process.

Get this recipe on Cookidoo https://cookidoo.co.uk/recipes/recipe/en-GB/r178855

Vanilla bean and sugar

Vanilla Bean Paste

Vanilla is one of the most expensive spices available – saffron takes the prize for the most pricey. Its high cost is due to the intense labour needed to produce each bean. The pods hold the seed of the vanilla orchid and each flower must be pollinated individually. Once harvested, the pods are dried and sweated before being used in perfume making and aromatherapy as well as the culinary world. Vanilla bean paste has a more concentrated vanilla flavour.  Making your own homemade vanilla bean paste is a simple, easy and effortless process that can save you money and give you the best quality of bean paste for all your baking needs. Add it to your baked good when you want to enhance the flavour of vanilla.

I’m so lucky to have access to fresh vanilla from India which I bring back with each time. But you can buy vanilla pods in bulk from various different retail and online stores too.

Vanilla is a baker’s best friend. Its beautiful rounded flavour brings out sweetness and caramel notes in its accompanying ingredients making it an excellent addition to cakes, custard, ice cream and patisserie. Its use in European cooking is synonymous with sweet dishes but in much of the world it is considered a savoury spice. For something a little different, try pairing with the wonderful sweet savouriness of lobster.

Credit: This recipe has been re-blogged from Australian sisters, Tracey and Joanne, a.k.a. Sistermixin now under their ‘Additive Free Lifestyle’ website. It’s been one of their most popular recipes and I’ve personally been making it for years. I’ve just made them again in time for gifting as Christmas presents.

How to make Easter Eggs using natural food dyes

The egg, an ancient symbol of new life, has been associated with pagan festivals celebrating spring. From a Christian perspective, Easter eggs are said to represent Jesus’ emergence from the tomb and resurrection. However, real eggs continue to be used in Central and Eastern European traditions. Although eggs, in general, were a traditional symbol of fertility and rebirth, in Christianity, for the celebration of Eastertide, Easter eggs symbolize the empty tomb of Jesus, from which Jesus resurrected.

The practice of coloring Easter eggs is very much alive in Poland today as well as enjoyed by Polish people all over the world. There are several techniques for making ‘pisanki including the use of wax flowing from a pipe or funnel, producing richly ornamented designs or the etching of designs onto a previously colored egg. The geometric and floral patterns or the animal and human images produced reveal a high level of craftsmanship and artistry.

The pisanki derive from an ancient tradition when eggs, the symbol of life, were endowed with magical properties and were thought to ensure both a plentiful harvest and good health. The name Pisanki comes from the Polish word “pisac”, which means to write.

This method to dye eggs using natural foods is definitely one for the bucket list this Easter and very easy to prepare using your Thermomix. Super fun times for the whole family. I love colouring Easter eggs and until recently I always used to buy these little food colouring tablets in my local supermarket. This year I decided to go a little more natural and try something different. I am so impressed with the results of Thermomix natural Easter egg dye and I can only recommend you try it for yourself. It is a great way to make use of leftover vegetables and scraps that you would have otherwise chucked away. There are so many colours you can make but I have listed my favourites and also included a method below for you. When you’re done with the big Easter egg hunt, simply use up the leftover boiled eggs to make my tasty Egg salad.

On the Saturday before Easter Sunday, Poles paint hard-boiled eggs (called pisanki) and then have them blessed. I’m not sure given the current status of lockdown if we can go to church but we’ll be sending our prayers around the world. Happy Easter.

Amai Sauce (Wagamama Style)

Anyone who has been to Wagamamas with children is sure to be familiar with Amai sauce. Offered as a sauce on the side to their children’s meals. My daughter loves it, we have to order an extra portion. This is my homemade Thermomix version of the delicious, sweet sauce from Japan. It keeps for a few weeks in the fridge (if it lasts that long)

My kids love this sauce and anyone who has kids will be familiar with it as it served as the accompaniment to the kids’ meals.

Eat with chicken covered in panko crumbs, rice or stir fries.

Garlic & Ginger Paste

Garlic and ginger are mainstays of many cuisines, especially in South Asia. Instead of chopping them for every dish, we tend to blend them into a paste that you can spoon directly into the dish you are making.

It amazes me how so many people just head to the supermarket and buy products like this. This version from Laila has 84% ginger and garlic, which is quite substantial. But it’s the other ingredients that worry me: Water, Salt, Corn Oil, Acidity Regulator: Acetic Acid , Thickener: Xanthan Gum, Preservatives: Sodium Metabisulphite [Sulphites], Sodium Benzoate. Going for a homemade version including a little salt and oil, means you know exactly what you are eating. Real food. Homemade.

Garlic, ginger paste is one of the essential part of daily Indian cooking. It’s really time saver if it’s made in bulk, which would last longer with out freezing it. So here’s an easy recipe with easy home preservative to make ginger garlic paste last longer up to 2 to 3 months.

For low fat recipes, leave the oil out and just add a little water to help the garlic blend into a smooth paste.

Leave the salt out if you are on a low sodium diet.

Tikka paste

This really easy homemade Tikka Paste is great to have handy in the fridge, ready for your next impromptu curry night.

A selection of Indian spices, fresh garlic, fresh ginger, garlic cloves, tomato puree, olive oil, and fresh coriander. Pop all the ingredients into the Thermomix and blend into a paste. The important part here that Thermomix can do that a normal blender can’t is the cooking part. The beauty of it is that once made you can stick the jars in the fridge and use as and when desired. It will keep for up to 3 months.

I like to marinade chicken pieces and then turn this into butter chicken, I slather it on salmon and steam it, or simply such as to any meat, fish or veggies plus a can of coconut milk for a quick curry.

Tomato Ketchup

Homemade Tomato Ketchup

Everyone loves ketchup, Heinz Ketchup in particular. But it’s loaded with so much sugar that making your own homemade ketchup has to be a better alternative.

There are many recipes for homemade tomato ketchup but I find this one the best. I love it because you sweeten the tomatoes not with oodles of sugar but with ripe plums.

It certainly passes the ‘Stopa kids’ taste test but I have to warn you, I do have to put it in a glass jar labeled Heinz. Yes, my son will consume it happily from any bottle or jar but my daughter, who is all about branding and awareness these days, won’t eat it if she doesn’t think it’s Heinz. She hasn’t quite worked out that the colour, consistency or taste is completely different than Heinz nevertheless as many parents do, I just deal with it. My favourite trick your child story recently is where one parent called pea and mint soup, ‘Incredible Hulk Soup’. The changing of the name made all the difference to the willingness of the children to consume it. So in my case, I haven’t changed the name just the delivery receptacle. I’ll do anything to make them eat healthier.

Because as Malcolm Gladwell once explained, Heinz doesn’t just taste good, or even great. It tastes objectively perfect: When Heinz moved to ripe tomatoes and increased the percentage of tomato solids, he made ketchup, first and foremost, a potent source of umami. (19 Aug 2014)

Credit: This recipe is from the TM31 Fast & Easy. Now long out of stock but still one of my favourite Thermomix books