One Girl and her Thermie

Enter your email address to receive latest offers and recipes:*
How to purchase a Thermomix®?

Dessert

becky-fantham-DIUJSBiJNoc-unsplash

How to make the lightest sponge cakes

A creamed sponge cake mix is the foundation of many classic cakes, from a Victoria Sponge (pictured) to a double chocolate cake. Here are 5 top tips to help you get the perfect texture every, single time.

  1. Get organised Cake batter put into a cold oven doesn’t rise properly, so always preheat your oven. Prepare the baking tins, as per the recipe, but in my experience oil or butter and then flour pans for an easy release. The Thermomix weighs all your ingredients, so that ensures the measurements are correct. Also check egg sizes. Usually, recipes state if it’s medium or large eggs needed, but if neither is stated, then use large eggs.
  2. Add maximum air to your dry ingredients. Sieving your flour will make everything light and airy. This is one of my favourite Thermomix tips. Throw away the physical sieve and use 5 seconds, speed 5 for your dry ingredients. Then add these to your wet ingredients to combine. Having two Thermomix bowls makes this easier – wet in one, dry in the other – but if you don’t do this step first and then decant it in another bowl.
  3. Whisk your wet ingredients (cream) perfectly. Recipes often ask for ingredients like butter to be at room temperature, but your Thermomix will help to whisk your sugar and butter mix from cold. Add cold butter in small pieces to combine the two quickly. You’re looking for a moussey texture. Once you see this light, yellow texture, add eggs, one by one, and don’t overbeat or it will split. If it does split, then add a spoonful of flour to bring it together again.
  4. Don’t dawdle After combining, spoon the cake batter into tins and put it into the oven straight away. Raising agents in the flour start to work quickly, and the air bubbles they create will deteriorate if you leave the mixture standing.
  5. Timing is everything Sticking a cake skewer or tooth pick into the centre of the cake is still the best method for testing if the cake is ready or not. It should come out clean, or with a few dry crumbly bits sticking to it. If it is wet, return to the oven for a few more minutes. Repeat if necessary. When cake is ready, turn them onto a wire rack once cool enough to handle, so they don’t over bake in the heat of the tin.

Extra tip:

Jam and cream are the classic fillings for a Victoria Sponge but why not mix things up a bit. Try creamy Nutella and sliced bananas, or lemon curd and mascarpone. But my favourite, hands down is a chocolate ganache.

  • Lemon Curd: https://cookidoo.co.uk/recipes/recipe/en-GB/r556933
  • Chocolate Ganache: https://cookidoo.co.uk/recipes/recipe/en-GB/r178874

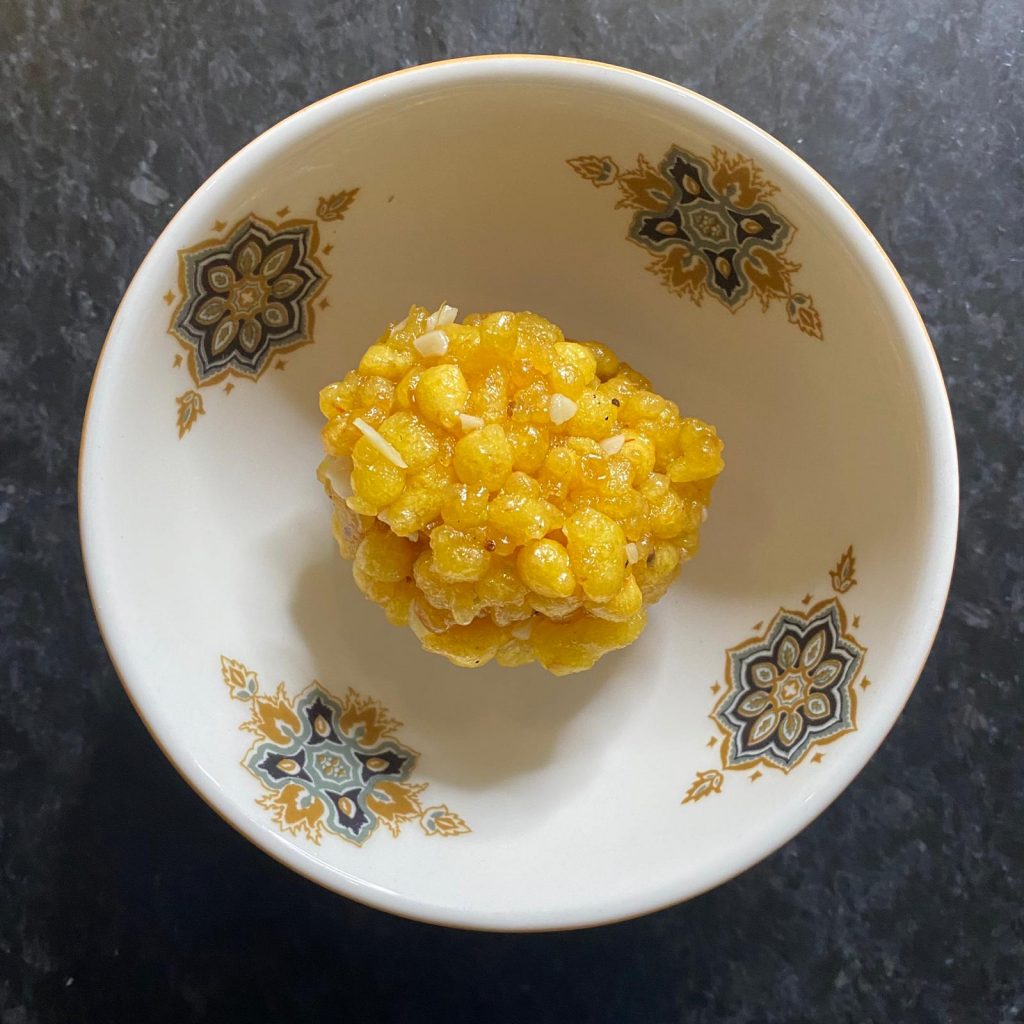
Motichoor Laddoo

Making Motichoor ke laddoos is easy but time-consuming. I’ll be honest until the second lockdown, I never made this before but the lockdown has made us all do things that we don’t usually do and at Diwali time, I would normally head to my favourite Indian Mithai shop and stand in line for the most amazing sweets. Even if the shop is open, I can’t see myself queuing for hours and social distancing. It’s just safer to stay home and convert recipes. I have a Thermomix, remember and in my Thermomix, I can make almost anything.

This recipe is for Motichoor Laddoo (also laddu) is a poplar and attractive, round-shaped laddoo recipe made with saffron-colored, boondi pearls. It is a well known sweet recipe and mainly prepared for festivals and occasions to share with family and friends. It is usually made with a boondi jhara but this recipe uses commonly available kitchen spoons.

The major difference between Boondi laddoo and motichoor laddoo is the size of the tiny boondi/fried gram flour balls. Boondi laddoo has the gram flour balls bigger in size and motichoor laddoos have smaller ones. Both the ladoos are made from gram flour or besan batter. The batter is poured through a ladle or sieve with perforations and these give rise to round shaped droplets, called as boondi (derived from the word ‘boond’ in hindi which means water droplets).

There are two types of boondi laddoos; one is a soft textured one and the other is a crisp hard one. Both these laddoos have some variations in the method, thus yielding different textures.

In Hindi the word ‘moti’ means pearl and ‘choor’ means to crush or crumble. Literally translated to crumbled pearls. Actually, when you hold these laddoos in your hand and even apply a little pressure, they crumble.

Laddoos are offered to many Indian gods & goddesses. Many Indian temples offer ladoos as prasad to the devotess. One of the most famous laddoos, we have had as prashad, are from the tirupati temple in Andhra Pradesh, India. Another prashad, we look forward is the boondi ladoo from shirdi sai temple, nasik, India. Whenever we want to make any food for deities then refrain from tasting or smelling the food. Prepare the food with lot of devotion, cleanliness and peaceful state of mind.

If you have a pooja or any religious activity at home, then these motichoor laddoos, can be given as prashad to the devotees.

So if you, like me, are celebrating Diwali this weekend, then I hope you enjoy this recipe.

We all fight together this pandemic, pray for all those families who have lost the loved ones, broken relationships, lost jobs and hope the best to come for everyone just as Diwali teaches us that light triumphs over darkness, good over evil, knowledge over ignorance.

Barfi

Milk Powder Burfi

Burfi (Burfee, Barfi) is a fudge-like milk sweet and often served at Diwali (Deepvali) celebrations. Like fudge, the process of making burfi may seem simple however can be tricky. This Thermomix version takes all the guesswork out.

Traditionally this requires khoya or mawa – milk powder – and some does need sugar syrup. But I always like to take shortcuts and have prepared using milk powder and this does not require you to make any sugar syrup or check for consistency. This method using milk powder makes it quicker and easier with no compromise in taste if you follow the steps exactly as given below.

Chocolate Mousse Ice-cream

Thermomix Cost Saving: Chocolate Ice-cream

How do you save money with your Thermomix? There are so many ways that owning a Thermomix can help you save you a little or a lot off your weekly grocery bill that I thought I’d share some of my Top Tips!  In this series of blog posts, I will share Thermomix Cost Saving tips, let’s talk about ice-cream, chocolate ice-cream in the Thermomix to be exact…

Summer is here and for anyone who has visited an ice-cream van in the past few weeks, will realise that you don’t get much change from £20 for a family of 4. We went to Ikea last week and my daughter wanted an ice-cream from the van in the car park. She requested a lime screwball and I was hit with a bill of £4.50! I wouldn’t mind if it was worth it but when she was eating it, she said she could taste the sugar – highly sugared ice-cream and the lime syrup was sickly. What a waste of money.

We have been doing cost savings with my team and I was glad to see that Ellie Mantle had actually made and costed out the savings making homemade ice-cream.

How do you make chocolate ice cream in the Thermomix?

Ingredients
Whipped Cream
  • 300 g double cream
  • 50 g icing sugar
Chocolate Custard
  • 350 g dark chocolate, small pieces or callets
  • 300 g double cream
  • 100 g caster sugar
  • 6 egg yolks, from medium eggs
Egg Whites and Serving
  • 6 egg whites, from medium eggs
  • 1 pinch cream of tartar
  • 2 Tbsp caster sugar

Instructions

Whipped Cream
  1. Place the freezer-proof container for storing the ice cream in freezer.
  2. Insert butterfly whisk. Place cream and icing sugar in mixing bowl then, without measuring cup, whip without setting a time/speed 3 until softly whipped, watching carefully to avoid over-whipping. Remove butterfly whisk, transfer to a bowl and refrigerate. Clean mixing bowl.
Chocolate Custard
  1. Place chocolate in mixing bowl and grate 5 sec/speed 8. Transfer to a bowl.
  2. Place 50 g grated chocolate in a bowl and set aside for garnish.
  3. Place 300 g grated chocolate, cream, sugar and egg yolks in mixing bowl then cook 8 min/80°C/speed 4. Transfer to a wide, shallow bowl to cool. Clean mixing bowl and butterfly whisk thoroughly (see tips).
Egg Whites and Serving
  1. Insert butterfly whisk. Place egg whites, cream of tartar and caster sugar in mixing bowl then, without measuring cup, whip 3-4 min/speed 3.5 until stiff peaks form.
  2. When chocolate custard mixture is cool, gradually fold in whipped cream with spatula.
  3. Remove butterfly whisk, then carefully fold egg whites into chocolate custard-cream mixture with spatula. There should be no swirls of egg whites or whipped cream in the mixture.
  4. Spoon mixture into the container from freezer. Cover tightly with cling film on the surface and freeze for 2 hours or longer. Check consistency before serving. If very hard, place in fridge until desired consistency is achieved.
  5. Serve ice cream sprinkled with reserved grated chocolate.

Useful Items

cling film, freezer-proof container, freezer, refrigerator


Hints & Tips
  • Use good quality dark chocolate with high cocoa content (70% cocoa) for best results.
  • Cream whips better when chilled and may not take long to form peaks depending on temperature and fat content. Watch carefully to avoid over-whipping.
  • Egg whites whisk better at room temperature.
  • For best results use egg whites that are approx. 7-14 days old.
  • The egg whites, mixing bowl and butterfly whisk must be free of any trace of egg yolk or grease when whisking or they will not rise properly.
  • To make your own icing sugar for the whipped cream, grind 100-200 g granulated sugar 15 sec/speed 10. Retain excess for future use.
  • Other garnishes can include candied orange zest, finely chopped hazelnuts or roasted almonds.
This is a Cookidoo recipe – Chocolate Mousse Ice-cream
Ellie shopped in Lidl so ingredients used to cost the following:
  • 350g Dark Chocolate, £1.50
  • 6  medium free-range eggs £0.70
  • 600ml of double cream £1.70
  • Sugar (caster and icing) £0.008
  • Pinch of cream of tarter 0.1p.
  • >>Cost per scoop = 43.5p!

That’s a 10-fold cost saving. And if it just wasn’t for the money, my daughter said it tasted better too. Of course, it did.

Strawberry Yoghurt

Thermomix Petit Filous

The wonderful Dèsirée Castro Rodríguez, a fellow Team Leader re-engineered Petit Filous for a Thermomix and the results are amazing. It’s so easy to do and the proof is in the pudding. My kids will wolf this down in seconds.

In 1986, Petits Filous fromage frais launched in the UK. Today, Petits Filous is the #1 Kids fromage frais brand in the UK, containing both calcium and Vitamin D which help build strong bones.  My kids, like most children, brought up in the UK,  adored this when they were younger and parents in the UK start weaning their kids with this in their little pot range and move up to the bigger size when their appetites grow.

In the UK, its something we give our kids when they are weaning and beyond, so looking at the ingredients list is a little worrying.

Ingredients: Fromage frais (Skimmed milk, Cream, Lactic cultures) – Sugar 6.2% – Strawberry Purée from concentrate 5% – Fructose 3% – Carrot juice – Corn flour – Lemon juice – Natural flavouring – Milk mineral concentrate – Vitamin D.

As all Thermomix owners know, homemade is best and here you know exactly what is going into it – real food. Milk, cheese, sugar (which can be reduced) and fresh fruit. Obviously, you can vary the fruit to get different flavours. I’ve done combinations with raspberries, mango and blueberries successfully.

Magic bean chocolate cake

A delicious (and gluten-free) chocolate cake with a healthy difference—red kidney beans!  Sarah Wong’s recipe is one of the best known on the official Thermomix community recipe sharing site, however, there are thousands of other great recipes in here, with new ones posted every day here.

This gluten-free, but free, high protein cake is wonderfully moist and works with most canned beans. Chickpeas work but they have a bit of a strong taste.

I wanted to share it here just in case you haven’t tried this yet. Do try it. If anyone is familiar with my cooking, I am a strictly a non-GF, child-friendly family household. As a Thermomix Advisor I know of many unique and quirky recipes but often don’t make them, as usually there’s no point, they just don’t get eaten by my kids.  If this kidney bean chocolate cake got past Milan’s taste test (i.e. he had no idea he wasn’t) then I call that a fabulous result and encourage anyone and everyone trying to diversify their repertoire and sneak vegetables into their kid’s diets.

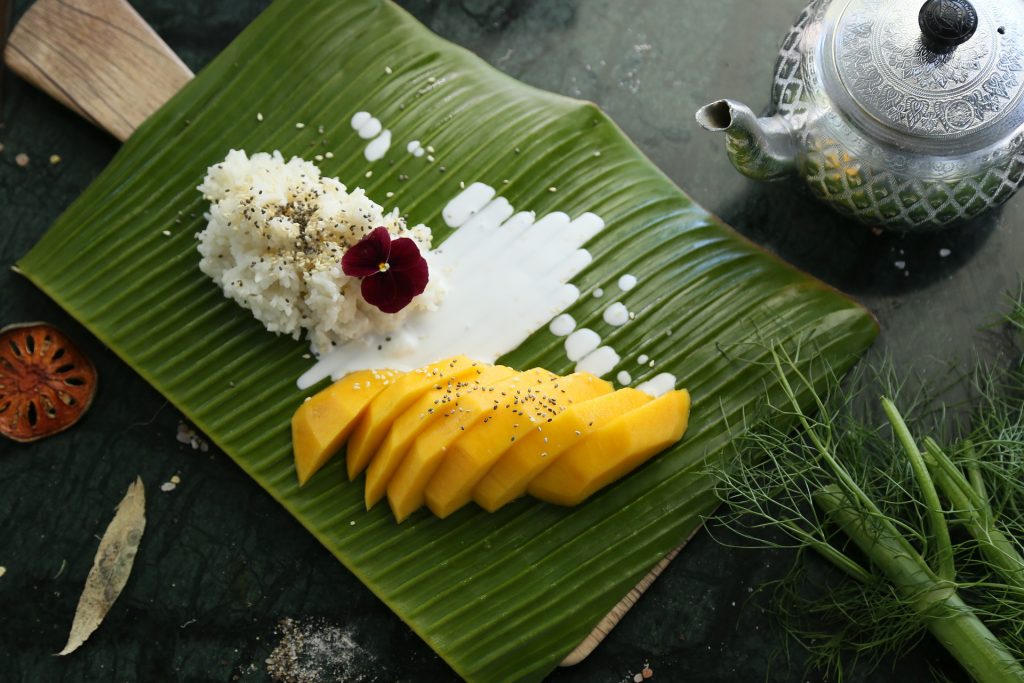
Thai Mango Sticky Rice

Mango sticky rice

Mango sticky rice is a traditional Thai dessert made with glutinous rice, fresh mango, and coconut milk, and eaten with a fork, spoon, or sometimes the hands. Although originating in Thailand, it is consumed throughout the Indochina region of Southeast Asia, including Laos, Cambodia, and Vietnam.

As the weather gets colder in the UK, I want to hibernate and for some reason, my palate leans towards all Asian dishes. This mango sticky rice dessert with coconut milk – a simple, heavenly Thai classic hit the dessert spot every single time.

I have converted this recipe to Thermomix but used this BBC Good food recipe as a guide.

Strawberries covered in chocolate

Chocolate Covered Strawberries

These tasty chocolate covered strawberries make the perfect summer dessert or sweet afternoon treat.  With Valentine’s Day coming up, it’s the perfect present. It says you have made an effort for the person you love.

The melted chocolate is made with the addition of coconut yogurt which gives it a lovely rich and creamy texture. This is a very simple dessert to make in the Thermomix and one where it looks like you’ve put a bit of effort in but really it’s a doddle to make. The added coconut yogurt which thickens the chocolate sauce and helps it go further, especially if you have an abundance of large strawberries that need to be eaten.

Credit: I can’t take credit for converting this recipe. Why re-invent the wheel. This recipe has been slightly adapted from Thermomix Diva, a British mum living down under.

Basil ice-cream

Basil Sorbet

This recipe for basil sorbet is tongue-tingling ice that delivers the refreshing flavours of summer. I think this is a beautiful palate cleanser rather than dessert, which is why I’m posting near the busy festive season when lots of entertaining is done.

This is a fresh and simple recipe to make at home by yourselves. By following just a few simple steps, you’ll get a really tasty sorbet to offer to your friends—delicious enjoyed on its own, or made into refreshing popsicles, fancy ice-cubes to add a pop of herbaceous flavour to cocktails, or blended with water for a tasty granita.

With just 4 ingredients and all store cupboard essentials – who doesn’t have sugar, ice or lemon hanging around, there really is no excuse not to try this one. Be a domestic goddess and do it.