One Girl and her Thermie

Enter your email address to receive latest offers and recipes:*
How to purchase a Thermomix®?

Recipes

Liquid Soap

Making liquid soap from a bar is a simple life hack that takes substantially less time and uses fewer tools and ingredients than you think.

You can stretch a single bar of soap into a few bottles of liquid suds using a quick DIY process. Making liquid soap from a bar is a simple life hack that takes substantially less time and whilst ‘liquid soaps’ may be harder to find in the supermarkets there are plenty of bar soaps in stores. All it takes is around 10 minutes of prep time, a few supplies, and you’re ready to make your first batch.

Thank you to one of my Thermomix customers for sending me this recipe from the wonderful Petra of The Road to Loving my Thermomix.

Ingredients:

  • 120g soap bar, cubed
  • 1200g of water

Recipe:

  1. Blitz soap bar on speed 5, slowly working up to speed 8 until fine.
  2. Melt at 80 degrees, speed 2 for 2 minutes or until melted. Some people find they need to increase the temp and speed slightly. If its not melting increase to 90 degrees, speed 3. Add a little of the water to help the process.
  3. Continue to mix at 80 degrees, speed 2 whilst pouring water slowly in to the bowl through the hole in the lid.
  4. Continue to mix for 2 mins or until nice and smooth.
  5. It will look like milky water. Don’t panic like I did. I almost threw it out thinking I put too much water in.
  6. Pour into a big bowl.
  7. Now leave it for the day.
  8. As time goes on it thickens. Just keep giving it a stir every hour or so. Its not essential to stir hourly, just regularly.
  9. I bottled mine after approximately 12 hours. Keep any extra in a bottle in a cool dark spot until needed.
  10. If you find it’s too thick just pop it back into the TM Bowl and blitz on speed 8 for 30-60 secs. That will smooth it out again.
  11. Thin with a little water if needed

Disclaimer – Thermomix® is a cooking appliance intended to be only used for food preparation.

However, the recipes here are things I do with my own Thermomix.  I also have multiple Thermomixes and TM bowls, so I can safely use separate bowls for making these without any cross-contamination. I also clean the bowls thoroughly with soap, then vinegar, and finally run it through the dishwasher to ensure that it is thoroughly clean before making a food recipe in my bowl. If in any doubt, don’t make them.


Homemade hand sanitiser

What do you do when you can’t buy hand sanitiser in shops? Go for the homemade version of course.

“Homemade hand sanitisers are just as effective as what you buy as long as you use the right percentage of alcohol,” Dr David Agus told CBS News. “This is a good way to get around people price-gouging.”

To make hand sanitiser, you need Isopropyl alcohol, known as rubbing alcohol, aloe vera gel, a bowl (or in our case a Thermomix), a spoon, a funnel, and either a spray bottle or liquid soap container.

The first step is pouring ⅔ cup of alcohol and ⅓ cup aloe vera, which will make the sanitiser easier to apply, into the bowl and mixing well.

Once the mixture is blended, you can use the funnel to pour the mixture into containers.

If you want to mask the scent of alcohol, you can add five to 10 drops of essential oil such as lavender, according to the outlet.​

I’ve used doTERRA On Guard, a proprietary essential oil blend, provides a natural and effective alternative for immune support when used internally. As one of doTERRA’s best-selling blends, doTERRA On Guard protects against environmental and seasonal threats with essential oils known for their positive effects on the immune system when ingested.* doTERRA On Guard can be taken internally on a daily basis to maintain healthy immune function and support healthy cardiovascular function. It can also be used on surfaces throughout the home as a non-toxic cleaner. When diffused, doTERRA On Guard helps purify the air, and can be very energizing and uplifting.

You can purchase doTERRA oils from here. I use doTERRA also in cooking after doing a Cooking class with Tenina Holder a few years ago. http://doterra.myvoffice.com/ankitastopa/#/ 

Ingredients:

  • 833g isopropyl alcohol (99%)
  • 38g hydrogen peroxide (3%)
  • 14g glycerin
  • 115g water
  • A few drops of essential oil (optional)

Instructions:

  1. Add the isopropyl alcohol, hydrogen peroxide, and glycerin to the mixing bowl of your Thermomix. Mix the ingredients together for 20 seconds at speed 4.
  2. Slowly add the water to the mixing bowl, mixing the ingredients together for another 20 seconds at speed 4.
  3. If desired, add a few drops of essential oil to the mixture, and mix everything together for a final 10 seconds at speed 4.
  4. Pour the hand sanitizer into clean bottles with pump dispensers or spray caps, and label them with the date and contents. Make sure the bottles are tightly sealed and store them in a cool, dry place.

That’s it! You can now use your homemade hand sanitizer as needed.

Disclaimer – Thermomix® is a cooking appliance intended to be only used for food preparation.

This recipe was converted from the article in the Independent online article, CORONAVIRUS: HOW TO MAKE YOUR OWN HAND SANITISER, ACCORDING TO EXPERTS.

However, the recipes here are things I do with my own Thermomix.  I also have multiple Thermomixes and TM bowls, so I can safely use separate bowls for making these without any cross-contamination. I also clean the bowls thoroughly with soap, then vinegar, and finally run it through the dishwasher to ensure that it is thoroughly clean before making a food recipe in my bowl. If in any doubt, don’t make them.

How to make Easter Eggs using natural food dyes

The egg, an ancient symbol of new life, has been associated with pagan festivals celebrating spring. From a Christian perspective, Easter eggs are said to represent Jesus’ emergence from the tomb and resurrection. However, real eggs continue to be used in Central and Eastern European traditions. Although eggs, in general, were a traditional symbol of fertility and rebirth, in Christianity, for the celebration of Eastertide, Easter eggs symbolize the empty tomb of Jesus, from which Jesus resurrected.

The practice of coloring Easter eggs is very much alive in Poland today as well as enjoyed by Polish people all over the world. There are several techniques for making ‘pisanki including the use of wax flowing from a pipe or funnel, producing richly ornamented designs or the etching of designs onto a previously colored egg. The geometric and floral patterns or the animal and human images produced reveal a high level of craftsmanship and artistry.

The pisanki derive from an ancient tradition when eggs, the symbol of life, were endowed with magical properties and were thought to ensure both a plentiful harvest and good health. The name Pisanki comes from the Polish word “pisac”, which means to write.

This method to dye eggs using natural foods is definitely one for the bucket list this Easter and very easy to prepare using your Thermomix. Super fun times for the whole family. I love colouring Easter eggs and until recently I always used to buy these little food colouring tablets in my local supermarket. This year I decided to go a little more natural and try something different. I am so impressed with the results of Thermomix natural Easter egg dye and I can only recommend you try it for yourself. It is a great way to make use of leftover vegetables and scraps that you would have otherwise chucked away. There are so many colours you can make but I have listed my favourites and also included a method below for you. When you’re done with the big Easter egg hunt, simply use up the leftover boiled eggs to make my tasty Egg salad.

On the Saturday before Easter Sunday, Poles paint hard-boiled eggs (called pisanki) and then have them blessed. I’m not sure given the current status of lockdown if we can go to church but we’ll be sending our prayers around the world. Happy Easter.

Pesto Rosso

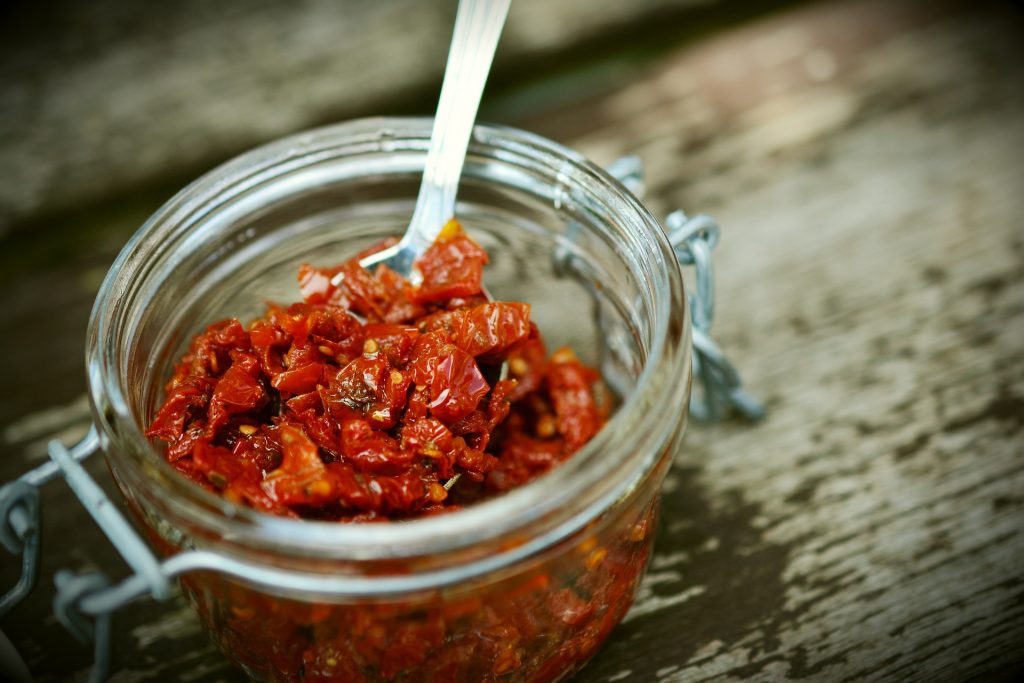
Being adventurous doesn’t have to be going all out and skydive. It could be trying a new recipe in the kitchen. For example this delicious Pesto Rosso.

Pesto Rosso (literally, “Red Pesto”) is a Sicilian variation that starts with sun-dried tomatoes. It has a rich red hue and a deep, sweet, tangy flavor. Like all pestos, Sun-Dried Tomato Pesto recipes also vary by region and cook. The sauce typically calls for almonds instead of the pine nuts used in basil pesto.

Really easy to make and very nice. Different to the usual green basil pesto but great to garnish vegetable tagliatelle, for tapas or pasta. Thanks to fellow Advisor, Sara De Miguel Hernandez for this recipe under her business Flow with Me.

Lemons

Lemon Concentrate Cleaner

This lemon concentrate cleaner is a beauty. First written on the Thermomix UK website when I bought my TM31 back in 2009, it’s been lost in the archives and I’m here to revive it.

Lemon contains both acidity found in the juice along with grease-cutting oil within its skin, combined to create a superb cleaning companion. The acid in lemons is also antibacterials and antiseptic and acts as a natural bleach. The citrus smell of lemon is refreshing and invigorating. Oils in the rinds help the clean and shine. With salt, you can throw away many of the harsh, chemical-based products under your sink or in your cleaning cupboard.

But there’s just one caveat to bear in mind. While lemons and lemon juice can do a great job with many household chores, it is not a disinfectant. In other words, it is not a good substitute for bleach or related products when you are actually trying to remove dangerous microbes from cooking surfaces. Because food safety is important, be sure to hang onto appropriate cleaning products and use them as needed.

Uses include cleaning copper bottom pots and pans, countertops, drains, glass cleaning, fridge freshener, microwaves, cheese graters, wood cleaner, etc. Of course, I use it to clean my TM bowl too. This homemade lemon cleaner is acidic and can be used to clean countless things in your home.

Disclaimer – Thermomix® is a cooking appliance intended to be only used for food preparation.

However, the recipes here are using food ingredients – lemon, salt, water, vinegar I also have multiple Thermomixes and TM bowls, so I can safely use separate bowls for making these without any cross-contamination. If in any doubt, don’t make them.

Egg nog

This deliciously creamy eggnog recipe is a little taste of Christmas history so easy to whip up and enjoy with your Thermomix.

Eggnog, egg nog or egg-nog, historically also known as milk punch or egg-milk punch, is a rich, chilled, sweetened, dairy-based beverage. It is traditionally made with milk, cream, sugar, whipped egg whites, and egg yolks.

According to Opieeggnog has its roots in British aristocracy: “In the winter, the wealthy would drink warm milk and egg beverages seasoned with pricey spices such as ground nutmeg and cinnamon and expensive liquors like brandy and sherry to keep it from spoiling.” When the drink passed to America, rum was used.

Soy candles

Thermomix Soy Candles

I first made these Thermomix soy candles after reading the amazing blog by Petra at The Road to Loving my Thermomix.  I love the versatility of what I can make in my Thermomix.

Who doesn’t love decorating their home or apartment with a beautiful candle? They add warmth and light to every space and just generally make your home feel cozier. The only problem? They don’t last forever and can be a little pricey. A lot pricey. I’m a big fan of Jo Malone or Molton Brown candles but one candle can set you back a whopping £50. Yes, £50 for one candle. So for any of us who want to have the luxury but spend a little less, there’s always a way to do it more cost-effectively.

You can make homemade candles with a few supplies and a little bit of know-how. Chances are you have a lot of the things you’ll need already at home. Another bonus of making your own candles is that you can control what goes into them. If you’re sensitive to fragrance, you can leave it out. If you’re concerned about keeping the air in your home as clean as possible, you can choose to use soy wax. Although there are many different types of candles, they all contain three main components: wax, a wick, and a container.

  • Wax
  • Wick
  • Container
  • Fragrance and color (optional)

I tend to advocate using soy wax. Soy wax is a natural, renewable resource. Soy wax is biodegradable and cleans up with plain old soap and water (again a good thing as I’m using my Thermomix to melt the wax). Soy wax has a lower melting point than paraffin wax and because of this, soy candles will burn slower or longer than paraffin candlesSoy wax burns with zero petro soot, creating petro soot free candles.

Benefits of soy wax
  • Soy wax is derived from a vegetables, (soy beans), while it’s counter partner, paraffin wax is derived from petroleum (a refined a gasoline product).
  • Soy wax is a natural, renewable resource.
  • Soy wax is biodegradable and cleans up with plain old soap and water.
  • Soy wax has a lower melting point than paraffin wax and because of this, soy candles will burn slower or longer than paraffin candles.
  • Soy wax burns with zero petro soot, creating petro soot free candles. Paraffin candles burn with petro-soot.

After making your first candle, you can get more adventurous and try making different types of candles, just be sure to choose the appropriate wax and wick for a more advanced project. Want a more personal touch? You can customize your candle even further by choosing a fragrance or essential oil to scent your candle—the variations of candles you can make are limited only by your imagination and your willingness to experiment.

From simple projects like basic container candles and votives with wick pins to more complex creations like beeswax rolled pillars and dipped taper candles, there’s no shortage of craft projects you can do with a bit of wax, a heat source, and some time.

It’s incredibly easy to make your own soy candles at home. Although it’s simple to make average candles, customizing your wax, wick, fragrance, and container choices will yield spectacular results. Not only will you save money making your own, but you can also give these beauties as gifts during the holidays (or any time!). Happy making!

N.B. The soy candles in the picture have been coloured red with food colouring and scented with a Christmas spiced essential oil, ready to be given as gifts this Christmas.

Disclaimer – Thermomix® is a cooking appliance intended to be only used for food preparation.

Vorwerk, the manufacturer of Thermomix only advocates making food items in your Thermomix. As a user, I know how versatile the Thermomix is and as a result, blog recipes like this which are non-food such as these candles, beauty products, children’s craft, etc. I also have multiple  Thermomixes and multiple TM bowls, so I can safely use separate bowls for making these without any cross-contamination. The bowls do wash and I recommend a hot vinegar or lemon wash to ensure no cross-contamination of any of the ingredients, but if in any doubt, don’t make them.

Chocolate Coconut Body Scrub

Chocolate Body Scrub

Want to make an awesome gift this holiday season? This Chocolate Coconut Body Scrub takes ingredients you likely already have on hand in your kitchen and turns them into a deliciously scented body scrub that leaves your skin moisturized and smooth. It uses only 4 ingredients and takes less than 5 minutes to make and is a great, inexpensive gift for the holiday season! I have been leaving my jar next to my kitchen sink and it’s a game-changer! Soft, moisturized, exfoliated skin!

As the winter creeps upon us, this means dry skin season, especially if you live in a cool climate like the UK. I’ve purchased store-bought sugar scrubs from the likes of Champneys before and loved them, but remember how easy and cheap they are to make yourself.

Most people know that coconut oil is a good moisturizer for your skin but when coupled with an exfoliant, in this case, one found in your store cupboard, it turns into a magical homemade body scrub. All you need is 5 minutes, 4 ingredients for this Chocolate Coconut Body Scrub.

This also makes a great gift to give during the holiday season, or really any time of year! The recipe makes enough for about 1 large mason jar (or 2-4 smaller ones) but can easily be doubled or tripled to give away to all your friends and family. Just put on a cute label with instructions on how to use and bring with you as an easy and inexpensive hostess gift or secret Santa!

And YES this is edible! But we don’t recommend this for anything other than a body scrub, though it certainly smells super tasty. Honestly, we love this body scrub so much that we plan to make some different variations in the near future to share with you as well. I’ll be posting more this week, so look out for them.

Disclaimer – Thermomix® is a cooking appliance intended to be only used for food preparation.

However, the recipes here are using food ingredients – sugar, spices, coconut oil, food colouring etc. which I do cook with so I am happy to make ‘beauty’ products using my Thermomix. I also have multiple TM bowls, so I can safely use separate bowls for making these without any cross-contamination. If in any doubt, don’t make them.

Dishoom Okra Fries

Dishoom Okra Fries

From the first day ate at Dishoom’s Flagship restaurant in Shoreditch, I feel in love with their Okra Fries. Ever since we have been devouring these crispy, salty, savoury okra chips every time we visit.

Okra’s high levels of vitamin A, B vitamins (B1, B2, B6), and vitamin C, and traces of zinc and calcium, make it an ideal vegetable to eat during pregnancy. Okra also serves as a supplement for fibre and folic acid, so is a great superfood for the whole family.

I was never a fan of okra (bhindi, in Hindi). If it isn’t cooked well, it can result in a slimey, gluey texture which isn’t great. Okra actually has a mild flavor that some say tastes like the eggplant. Its texture though is very different simply because it is more fibrous and tender if picked at the right time. The slime that it has will also make the vegetable have a silky texture on your tongue. However, if cooked properly, like in this recipe there’s not a slither of glue or slime insight.

No more soggy, slimey, dried out or bland okra for us. This okra fries recipe is mouthwateringly good and moreish. It’ll have you coming back time and time again. Guaranteed.