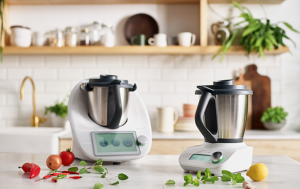
Thermomix Cost Saving: Cheese
How do you save money with your Thermomix? There are so many ways that owning a Thermomix can help you save you a little or a lot off your weekly grocery bill that I thought I’d share some of my Top Tips! In this series of blog posts, I will share Thermomix Cost Saving tips, cheese…grating cheese in the Thermomix to be exact…
Why grate your own cheese?
- Taking Catherdral City Mature Cheese as an example, 550g block costs, £4.50 which works out at £8.18 per kilo. A 180g bag of grated cheese costs, £1.50 bringing the cost per kilo to £8.33, so a small cost-saving can be seen.
- However, if we take parmesan as an example again from Sainsbury’s supermarket, a 200g block of Sainsbury’s Parmigiano Reggiano Cheese costs £3.30 (£16.50/kg). The same brand of grated cheese in a 120g bag costs £2.65 (£22.08/ kg) and the 60g bag costs £1.35 (£22.50/kg). That’s £6 per kilo saving which is considerable. Think about how many times you sprinkle parmesan on your pizza, risotto, or spag bol and therefore how much you could be saving using use on cheese.
- Commercially grated cheese includes anti-caking agents
- More than twice the plastic packaging required.
How do you make grated cheese in the Thermomix?
Grated cheese is super quick to make in the Thermomix.
Take 1 kg of block cheese and divided it into 250g blocks. Divide each block again into quarters.
Place 250g of the cheese cubes into TM bowl. Grate 4 seconds on Speed 9. Remove the cheese and place it into a container for storage in the fridge. Continue to process the cheese in 250g batches until all the cheese has been grated.
For parmesan, place up to 100g in the TM bowl in 30-40g chunks and grate 30 seconds, speed 10. You can also use the rind which helps your parmesan go further.
Notes: Prices and links to Sainsbury’s Website are correct as of May 2020. Please do drop me a note if the links have changed or been deleted.
Thermomix Cost Saving: Sugar
How do you save money with your Thermomix? There are so many ways that owning a Thermomix can help you save you a little or a lot off your weekly grocery bill that I thought I’d share some of my Top Tips!
In this series of blog posts, I will share Thermomix Cost Saving tips, starting with Sugar…
Sugar! How Many Different Types Of Sugar Do You Have In The Cupboard?
Do you buy granulated sugar, caster sugar, and icing sugar? Purchasing different types of sugar is not only not economical but it’s also taking space in your cupboard. I live in London, with small kitchens and even smaller cupboards. Sugar sitting in the cupboard waiting to be used is not very economical. Plus, these sugars take up valuable pantry space.
How do you make caster sugar in the Thermomix?
Add regular granulated sugar to the TM bowl. Mill 2 -3 seconds on Speed 8.
How do you make icing sugar in the Thermomix?
Add regular sugar to the TM bowl. Mill 1 minute on Speed 8. If you want the icing to be even finer. wait until the TM bowl cools (it will get hot from friction) then mill again for 1 minute on Speed 8.
Top tip
To ensure that your sugar grinds perfectly, use a maximum of 100g in the TM bowl and repeat if a larger quantity is needed.
The cost saving is incredible.
- 1 kg granulated sugar is 65p
- 1 kg of caster sugar is £1.60
- 1 kg of icing sugar is £1.70
As you can see you can save at least £1 each time you stop buying caster or icing sugar.
Notes: Prices and links to Waitrose Website are correct as of May 2020. Please do drop me a note if the links have changed or been deleted.
Coffee Face Scrub
Scrubbing the face with coffee grounds can help to clear away dead skin cells and unclog the pores. The chlorogenic acids in coffee may also reduce inflammation and protect against some strains of bacteria. This coffee face scrub is a brilliant recipe.
With all this free time spent at home in quarantine, I’ve been looking for completely natural ways to recreate some of my favourite products. I love using face exfoliators and there are some great 100 percent natural and sustainable ones out there on the market. However, for love or money, I can’t get down to my local Boots or Lush (who doesn’t love Lush), so it’s time to get creative in the kitchen. Again.
If you’re a coffee lover, the idea of using precious coffee beans in a body scrub might shock you, but give this DIY product a shot—you’ll be glad you did!
How to make a DIY Coffee Scrub
Thanks to Taste of Home blog for providing the background and recipe for this one.
Coffee Benefits for Skin
The sand-like texture of coffee grounds makes a great exfoliant in homemade scrubs. The grounds work to gently remove dead skin cells, which helps to rejuvenate and boost circulation. (Hello, youthful, glowing, silky-smooth skin!) Exfoliants can also plump and tighten, helping to temporarily reduce the appearance of cellulite.
I’m including the Thermomix and non-Thermomix method so everyone can benefit.
Ingredients:
- 80g medium coarsely ground coffee (fresh, if possible)
- 40g coconut oil
- 40g vitamin E oil
3 to 5 drops CBD oil (optional)
Recipe:
- Weigh coffee into TM bowl and then grind for 30 seconds, speed 6.
- Add coconut oil and heat 2 minutes, 50 degrees, speed 3 to combine.
- If adding CBD oil, add and then mix 10 seconds, speed 3.
- Decant into and bowl and use.
- Gently apply and massage into the skin in circular, upward motions for three minutes.
- Rinse with water and pat dry.
Disclaimer – Thermomix® is a cooking appliance intended to be only used for food preparation.
However, the recipes here are things I do with my own Thermomix. I also have multiple Thermomixes and TM bowls, so I can safely use separate bowls for making these without any cross-contamination. I also clean the bowls thoroughly with soap, then vinegar, and finally run it through the dishwasher to ensure that it is thoroughly clean before making a food recipe in my bowl. If in any doubt, don’t make them.
Top 10 Bakes during Lockdown
Baking has become the nation’s biggest boredom breaker to fill the days of lockdown which has resulted in shortages of flour and yeast all over the country.
Baking is a great way to unwind, pass the time and bring some fun into the household.
So here’s are the top 10 favourites as compiled by BakeryandSnacks.com with my favourite recipe suggestions to use with a Thermomix.
- Apple Pie – A truly delicious apple pie is about two things: perfect pastry and a generous filling of sweet, fluffy apples. This recipe delivers on both counts.
- Cheesecake – This is a classic New York Baked Cheesecake that turns out perfect every time. It’s actually the most popular recipe on The 4 Blades blog, so when they were developing the ‘Champion Cheesecakes’ section, it was an absolute must-include. This is my all-time favourite recipe and when my Dad tried it, he said I should open a dessert shop, it’s that good.
- Rhubard Crumble For a classic spring pudding recipe, make this pretty rhubarb crumble recipe and serve with plenty of custard.
- Victoria Sponge The perfect party cake, a Victoria sponge is a traditional bake everyone will love. This recipe from Cookidoo is a good one and from the British Isles on a Plate cookbook.
- Cupcakes. I can’t take credit for this recipe, as it’s been converted by my friend Kerry New, who I believe converted it to the Thermomix from Country Women’s Association in Australia (CWAA) a recipe that her grandmother made. Hats off to the original creator of this recipe, it is still single-handedly my favourite vanilla cake recipe and my go-to for birthday cakes and cupcakes. There’s also variations to the recipe which turn this basic recipe into chocolate, coffee, orange or lemon cake. No wonder it is my go-to.
- Bread Cooking can be good for the soul and making bread is such a rewarding, therapeutic, tactile thing – you’ll be so proud of yourself when you’ve cracked it. If you have never made bread before, I suggest you try this ‘Quick Bread’ recipe on Cookidoo which uses a Dutch Oven (I use my Le Creuset Cast Iron Casserole) to bake the bread. Do try it.
- Chocolate chip cookies A chocolate chip cookie is a drop cookie that originated in the United States and features chocolate chips or chocolate morsels as its distinguishing ingredient. Circa 1938, Ruth Graves Wakefield added chopped up bits from a Nestlé semi-sweet chocolate bar into a cookie.
- Lemon Drizzle Cake Everyone needs an easy lemon drizzle cake that is super-quick to bake and perfect to wheel out for office cake days or visiting mothers-in-law.
- Savoury Pie The secret it a good pie is the ingredients. This chicken and leek pie is a Cookidoo recipe from the British Isles on a Plate cookbook. I absolutely adore this recipe, as from start to finish the recipe is made in the Thermomix and it’s a great recipe.
- Rainbow Coloured Sponge Cake I’d like to take inspiration from Great British Bake-Off winner Candice Brown reveals how to make this show-stopping rainbow cake. Candice Brown’s rainbow cake recipe would be the perfect centrepiece for any charity bake sale, or party. The Great British Bake Off winner has created this showstopping rainbow cake to support children’s charity the Rainbow Trust – who offer support to seriously ill children and their families. And yes, I know this link isn’t to a Thermomix recipe. But if you’ve got this far, you surely would ve able to convert a recipe by now. If not, this is a fabulous time to try.
12-reasons to invest in a Thermomix
With our 0% finance offer on in April 2020, available for all purchases for Thermomix TM6, I thought I’d give you 12-reasons to invest in a Thermomix this month.
1. To simplify your life (in and out of the kitchen)
Doesn’t it feel good to declutter?!
The Thermomix replaces over 20 of your household appliances. Imagine the space you’ll create in your kitchen cupboards. Have a garage sale or eBay those big items (like the bread maker) that take up a lot of room for the limited time they’re in use! No need for measuring cups with the built-in scales in the Thermomix, or for smaller chopping gadgets that take time to pull apart and clean.
This is actually a picture of my friend and TM customer’s kitchen redesign by Omni Home Designs in Hertfordshire. Isn’t it just beautiful?
2. To save you valuable time in the kitchen.
Chopping, mincing, milling, grinding, stirring and kneading all done for you!
We all see how life throws certain demands at us and it’s easy to take short cuts in the things that matter most. Food preparation is one of those things! We choose quick frozen, or takeaway meals because we haven’t got the time to prepare more nutritious food…and quite frankly, convenience is killing us. Then, there’s the time you save cleaning up- one seamless, non-porous bowl helps clean itself! This is the ultimate fast food machine!
3. To eliminate those packaged foods with harmful additives and preservatives.
It allows you to avoid the chemicals in modern processed foods and returns you to the tradition of wholesome home-style cooking using the technology of the future. Make your own delicious nutritious marinades, sauces, butter, condiments like mayonnaise & custard.
This is the ultimate health machine.
4. To save you money in your trolley on many general items. (And on takeaway)
Did you know you could make 1 litre of fresh fruit sorbet for just £2.00? 500ml of Tesco’s Raspberry sorbet costs £2.20, so for the same cost, you can make double.
A good quality bread in the Thermomix will cost you around 50p as to £2-4 in the supermarket
Risotto in the TM is around £5 to make and it serves 5, I have paid up to £18 in a restaurant for a serving for one! These are just a few ways the Thermomix saves you money.
5. To save on your energy bill
The Thermomix costs around 15p an hour to run. When I got my Thermomix I reduced the amount of gas I was using with my cooker and my energy bill went down 20%; now that’s impressive especially since I was suddenly using the oven a whole lot more. We’ve done analysis that cooking a soup is 40% more energy-efficient than doing on the stove-top.
Faster and more efficient, and has no rival on the market. Featuring a gearless motor, Solingen steel blades, and a stainless steel bowl, Thermomix brings a new dimension to food preparation and cooking. The Thermomix is great for families on a budget!
6. Creativity made easy
Beautiful, infinite recipe possibilities with a line up of many books, websites and our very own recipe platform, called Cookidoo. With over 50,000 recipes available at your fingertips and new recipe collections every single week, in every single country, there’s always something new to create.
Cook like a pro with gourmet recipes all made by your Thermomix. The Thermomix gives you the edge!
7. It will reduce your carbon footprint (and your household rubbish)
It’s dreadful the amount of waste the average home creates on a weekly basis. Seeing that many of your meals can be made from basic ingredients such as vegetables, grains, legumes nuts and seeds, you’ll see a dramatic impact on your household waste. No more juice containers, no more cardboard boxes, less tin cans, and a reduction in plastics; the earth will have you to thank.
The environment is grateful for the Thermomix!
8. It will get the whole family preparing nutritious meals.
The delight to many of my customers has been, that their family has taken on more meal preparation! Previously, meals in my home were primarily made by me but now with the Thermomix having gone digital and easier to use, even hubby’s that don’t cook enjoy and appreciate the gadget that ends all gadgets! My kids as young as 8 and 11-years now use the Thermomix guided cooking functions unaided. The Thermomix brings families together in food preparation.
9. It’s compact and portable, making it the perfect travel companion. Who wants to be spending time cooking while on holidays?
Many of my customers have taken their Thermomix in their campers and away to their holiday homes as an all-in-one appliance that does the lot. You don’t even need saucepans and a kettle. This is the ultimate super kitchen appliance. I regularly take mine on holiday with me and last year, when we went to France, my Thermomix was slipped in the back of the car for our self-catering holiday. Yes, I know a holiday is a time to go out and eat, indulge in local cuisines and I’m all for that. But eating 21-meals in a week’s holiday out can be expensive and sometimes, that quick breakfast of perfectly boiled eggs or no-lump porridge for breakfast, or quick tomato sauce and pasta for little ones who need to eat early is a lifesaver.
10. It puts the enjoyment back into cooking.
The Thermomix does the hard jobs for you like stirring the risotto for 17 minutes while freeing you up to go have a shower, check your emails or just go put your legs up! What about the lump-free bechamel or custard without burning the bottom of the pan…gotta love that! The Thermomix will give you a love for cooking again.
11. To make beautiful homemade inexpensive gifts is just another way to save with the Thermomix. Give a gift that you’ve lovingly prepared and everyone will enjoy.
Make your own Christmas pressies such as Dukka, Lemon butter, Jam, and homemade chocolates!
The Thermomix makes gift-giving affordable and gift ideas easy. It’s also much cheaper than buying a hamper.
12. Makes entertaining a breeze!
Whip up dips and salads in just seconds. I use to spend the day in the kitchen preparing a dinner party- not anymore. I can whip up all sorts of delicious recipes in no time from starter to dessert.
Then there’s the superb cocktails, and after dinner coffee…oh yes it makes Cappuccinos & Lattes too! The Thermomix is being bought by cafes and restaurants all over the world!
*As you can see the investment in initial outlay, is nothing compared to all the things you get back with Thermomix. This is why Thermomix is sold every 2 minutes around the world. In China, during the Covid_19 lockdown, sales of Thermomix went up 80% as people were home.
Why wait when you can buy now, pay later?
You may like to take the opportunity to with our Ikano finance options to purchase a Thermomix.
If you would like a chance to see the Thermomix in action, why not join me on one of my Virtual Cooking demonstrations. I’m hosting them every couple of days. Why not? We’re all home.
To book call me today on 07977 563537 or see one of my socials for more recipe inspiration in terms of photos and videos.
Liquid Soap
Making liquid soap from a bar is a simple life hack that takes substantially less time and uses fewer tools and ingredients than you think.
You can stretch a single bar of soap into a few bottles of liquid suds using a quick DIY process. Making liquid soap from a bar is a simple life hack that takes substantially less time and whilst ‘liquid soaps’ may be harder to find in the supermarkets there are plenty of bar soaps in stores. All it takes is around 10 minutes of prep time, a few supplies, and you’re ready to make your first batch.
Thank you to one of my Thermomix customers for sending me this recipe from the wonderful Petra of The Road to Loving my Thermomix.
Ingredients:
- 120g soap bar, cubed
- 1200g of water
Recipe:
- Blitz soap bar on speed 5, slowly working up to speed 8 until fine.
- Melt at 80 degrees, speed 2 for 2 minutes or until melted. Some people find they need to increase the temp and speed slightly. If its not melting increase to 90 degrees, speed 3. Add a little of the water to help the process.
- Continue to mix at 80 degrees, speed 2 whilst pouring water slowly in to the bowl through the hole in the lid.
- Continue to mix for 2 mins or until nice and smooth.
- It will look like milky water. Don’t panic like I did. I almost threw it out thinking I put too much water in.
- Pour into a big bowl.
- Now leave it for the day.
- As time goes on it thickens. Just keep giving it a stir every hour or so. Its not essential to stir hourly, just regularly.
- I bottled mine after approximately 12 hours. Keep any extra in a bottle in a cool dark spot until needed.
- If you find it’s too thick just pop it back into the TM Bowl and blitz on speed 8 for 30-60 secs. That will smooth it out again.
- Thin with a little water if needed
Disclaimer – Thermomix® is a cooking appliance intended to be only used for food preparation.
However, the recipes here are things I do with my own Thermomix. I also have multiple Thermomixes and TM bowls, so I can safely use separate bowls for making these without any cross-contamination. I also clean the bowls thoroughly with soap, then vinegar, and finally run it through the dishwasher to ensure that it is thoroughly clean before making a food recipe in my bowl. If in any doubt, don’t make them.
Homemade hand sanitiser
What do you do when you can’t buy hand sanitiser in shops? Go for the homemade version of course.
“Homemade hand sanitisers are just as effective as what you buy as long as you use the right percentage of alcohol,” Dr David Agus told CBS News. “This is a good way to get around people price-gouging.”
To make hand sanitiser, you need Isopropyl alcohol, known as rubbing alcohol, aloe vera gel, a bowl (or in our case a Thermomix), a spoon, a funnel, and either a spray bottle or liquid soap container.
The first step is pouring ⅔ cup of alcohol and ⅓ cup aloe vera, which will make the sanitiser easier to apply, into the bowl and mixing well.
Once the mixture is blended, you can use the funnel to pour the mixture into containers.
If you want to mask the scent of alcohol, you can add five to 10 drops of essential oil such as lavender, according to the outlet.
I’ve used doTERRA On Guard, a proprietary essential oil blend, provides a natural and effective alternative for immune support when used internally. As one of doTERRA’s best-selling blends, doTERRA On Guard protects against environmental and seasonal threats with essential oils known for their positive effects on the immune system when ingested.* doTERRA On Guard can be taken internally on a daily basis to maintain healthy immune function and support healthy cardiovascular function. It can also be used on surfaces throughout the home as a non-toxic cleaner. When diffused, doTERRA On Guard helps purify the air, and can be very energizing and uplifting.
You can purchase doTERRA oils from here. I use doTERRA also in cooking after doing a Cooking class with Tenina Holder a few years ago. http://doterra.myvoffice.com/ankitastopa/#/
Ingredients:
- 833g isopropyl alcohol (99%)
- 38g hydrogen peroxide (3%)
- 14g glycerin
- 115g water
- A few drops of essential oil (optional)
Instructions:
- Add the isopropyl alcohol, hydrogen peroxide, and glycerin to the mixing bowl of your Thermomix. Mix the ingredients together for 20 seconds at speed 4.
- Slowly add the water to the mixing bowl, mixing the ingredients together for another 20 seconds at speed 4.
- If desired, add a few drops of essential oil to the mixture, and mix everything together for a final 10 seconds at speed 4.
- Pour the hand sanitizer into clean bottles with pump dispensers or spray caps, and label them with the date and contents. Make sure the bottles are tightly sealed and store them in a cool, dry place.
That’s it! You can now use your homemade hand sanitizer as needed.
Disclaimer – Thermomix® is a cooking appliance intended to be only used for food preparation.
This recipe was converted from the article in the Independent online article, CORONAVIRUS: HOW TO MAKE YOUR OWN HAND SANITISER, ACCORDING TO EXPERTS.
However, the recipes here are things I do with my own Thermomix. I also have multiple Thermomixes and TM bowls, so I can safely use separate bowls for making these without any cross-contamination. I also clean the bowls thoroughly with soap, then vinegar, and finally run it through the dishwasher to ensure that it is thoroughly clean before making a food recipe in my bowl. If in any doubt, don’t make them.
How to make Easter Eggs using natural food dyes
The egg, an ancient symbol of new life, has been associated with pagan festivals celebrating spring. From a Christian perspective, Easter eggs are said to represent Jesus’ emergence from the tomb and resurrection. However, real eggs continue to be used in Central and Eastern European traditions. Although eggs, in general, were a traditional symbol of fertility and rebirth, in Christianity, for the celebration of Eastertide, Easter eggs symbolize the empty tomb of Jesus, from which Jesus resurrected.
The practice of coloring Easter eggs is very much alive in Poland today as well as enjoyed by Polish people all over the world. There are several techniques for making ‘pisanki including the use of wax flowing from a pipe or funnel, producing richly ornamented designs or the etching of designs onto a previously colored egg. The geometric and floral patterns or the animal and human images produced reveal a high level of craftsmanship and artistry.
The pisanki derive from an ancient tradition when eggs, the symbol of life, were endowed with magical properties and were thought to ensure both a plentiful harvest and good health. The name Pisanki comes from the Polish word “pisac”, which means to write.
This method to dye eggs using natural foods is definitely one for the bucket list this Easter and very easy to prepare using your Thermomix. Super fun times for the whole family. I love colouring Easter eggs and until recently I always used to buy these little food colouring tablets in my local supermarket. This year I decided to go a little more natural and try something different. I am so impressed with the results of Thermomix natural Easter egg dye and I can only recommend you try it for yourself. It is a great way to make use of leftover vegetables and scraps that you would have otherwise chucked away. There are so many colours you can make but I have listed my favourites and also included a method below for you. When you’re done with the big Easter egg hunt, simply use up the leftover boiled eggs to make my tasty Egg salad.
On the Saturday before Easter Sunday, Poles paint hard-boiled eggs (called pisanki) and then have them blessed. I’m not sure given the current status of lockdown if we can go to church but we’ll be sending our prayers around the world. Happy Easter.